Create a kite shield in Photoshop
Learn how to create a coloured kite shield with this photoshop tutorial
Also take a look at other Photoshop tutorials...
Pre-press tips for Photoshop users | Colorizing a Grayscale image! | Post-it-note | Simple plastic button | Exploding text |
Pages
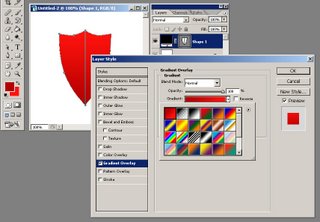
Now you need a little color on your shield so here is what you should do: set you foreground color to darken red, I used #b40000 and the background color to a brighter red, I used #ff130d. Double click the shape layer you just created in order to see the Lyer Style options and choose Gradient Overlay and from the Gradient picker choose Foreground to Background (it's the first gradient available). You should have something similar to this:

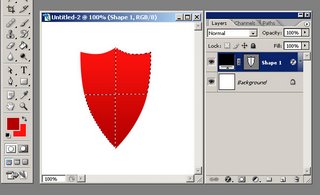
Now CTRL+Click the shape layer in order to Load it's selection and using the Rectangular Marquee Tool with the ALT key pressed (in order to substract from the selection) substract 2 times from our selection until you obtain a selection like the one I have in the image below:

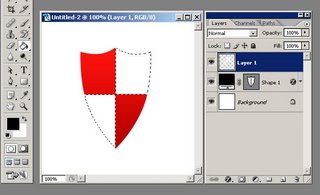
Create a new layer (mine is called Layer 1) above the shape layer (SHIFT+CTRL+N can be used) and then fill the selection with white. Your shield should look like this:

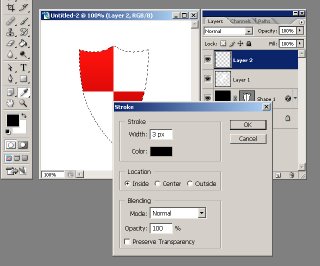
CTRL+Click the shape layer in order to Load it's selection again and create a new layer above all the layers in your image. Go to Edit menu and choose Stroke. On the dialog box that appears select the width of the Stroke to 3 pixels, set the Color to black and from Location select Inside.

Pages
Submitted by Martin on 2006-09-23 20:05:12. Since then read 131352 times.
Scored 2.9 points out of maximum 5 by 40 votes.
Also take a look at other Photoshop tutorials...
All About Adjustment Layers | Tolkiens Master Ring | Learn to use Quick Mask | Chrome effect | GOLD - the golden writing |
Rate this tutorial!
Invite a friend!
Discussion
No contributions yet.
Be the first one to add one!

