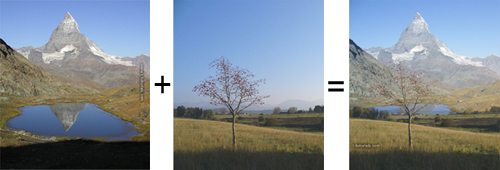
Flawless Collage of two Panorama photos
Merging of two different photos is not a problem with this tutorial. Learn more about it.
Also take a look at other Photoshop tutorials...
Alien text | All about Layer Mask | Tolkiens Master Ring | Simple plastic button | Vacation and holiday accessories tips |
Pages
Flawless Collage of two Panorama photos
How to join two photos. Some might say it is a piece of cake. Well, it is easy but not always. In the following tutorial you will learn the technique of merging two panorama photos without any visible joining border.

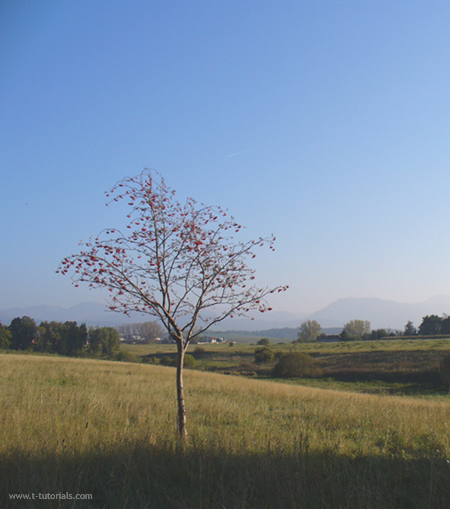
We will start with the bottom picture, in this case with the onw that will make the foreground of our collage. So if you wish to use these pictures, fell free to, they are both mine.
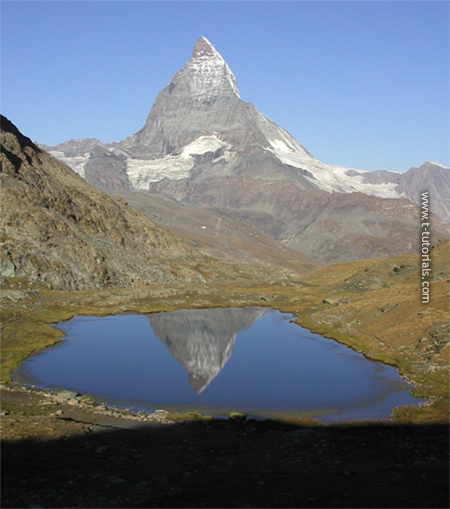
I took the first one near my hometown and the second one when I was in Zermatt (for anyone not eating Toblerone chocolate, it it Matterhorn :)
I hope you like my photos. If you wish to have a look on the other ones, check also other tutorials because I often demonstrate the effect on my own photographs.
Lets proceed to the first stage. If you want, use my picture. I dont know if your browser supports draging of the picture but in the case it does, do the following. Open the PhotoShop, Click on the picture below, hold the button clicked and drag the picture onto the Windows Start toolbar, rest the curson on the minimalised PS which will open in a while, and finally, whe it opens, drag the picture. Yeah, you have just simplified the procedure of using WEB picture :D

Now, open the second picture. In our case, it will make the backgroung of the collage. Here is my Matterhorn photo

Now, we will start with double click on the Matterhorn layer but firs a few word about the Blending Options.
Pages
Submitted by Martin on 2006-04-24 14:27:57. Since then read 119488 times.
Scored 4.37 points out of maximum 5 by 38 votes.
Also take a look at other Photoshop tutorials...
Understanding Curves | Vacation and holiday accessories tips | Pre-press tips for Photoshop users | Gold and Diamond logo | Blue Matter |
Rate this tutorial!
Invite a friend!
Discussion
Mr. B. C. Phukan bcphukan AT indiatimes DOT com said on 2006-05-03 12:57:35Martin ! Another masterpiece in Photoshop Tutorials which is not found generally found on the Net. Thanks once again.
Martin mato AT t-tutorials DOT com said on 2006-05-03 17:02:14
I am very pleased to hear that!!! I am glad you like my tutorials and that you leave a comment behind. Without feedback, tutorial-making becomes really dull. Thx once again. :D
Count Azurit said on 2006-05-13 21:07:03
I see you have made quite a name here ... But I have to give you credit for your tutorials ... they are really nice.
Martin mato AT t-tutorials DOT com said on 2006-05-13 22:11:35
Thx, I am glad to hear that, esp. from you, friend. Btw, if there is anything new about our Dreamfall, please be that kind and let me know. I hope your page will flourish as well and I shall be honored to take part in it if invited. Meet you at the Fringe caffe someday.
jbog91 said on 2006-05-20 04:56:42
Awsome tutorial. Very original. I've never found something like this and I could definately use this. Thanks man.
Martin mato AT t-tutorials DOT com said on 2006-05-24 11:52:07
I am glad it hepled. For future, if you are having problem with something in PS, just let me know and I will try to help. And also if you think that you could use a tutorial on certaion topic, let me know and I will do it. I amt your service, eager to held :D
Helmutt said on 2006-11-25 11:13:21
Thank you for providing these tutorials. I really like the way you use your own photographs with all their inherent difficulties. The results are great. I look forward to reading the other tutorials.
Martin mato AT t-tutorials DOT com said on 2006-11-26 11:23:09
lol, I like the word inherent, though I prefer the word implicit :) I am glad that you like it.
Anonymous said on 2008-03-05 20:13:20

